Send MMS over Sierra Fastrack Wireless modem
This text gives information about how to configure custom Multimedia Messaging Service (MMS) settings in Ozeki NG SMS Gateway to be able to send and receive MMS messages. If you follow the steps of this guide you will find information on how you can set GSM modem with Ozeki NG SMS Gateway and how you can set MMS sending and receiving with Ozeki NG. Before that please read our guide on how to set up the GSM Modem connection. After the physical connection has been set, you can start the installation and setting up the connection to send MMS messages.
Introduction
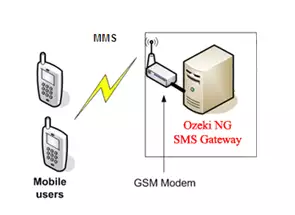
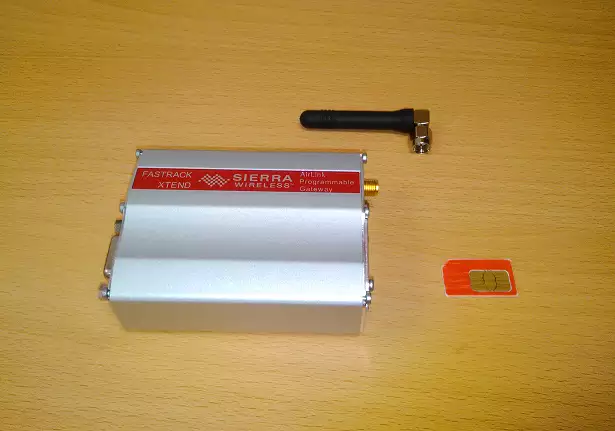
In this topic you will read about Sierra Wireless Fastrack Modem. You can find more information on what hardware products are necessary to connect this GSM Modem with Ozeki NG SMS Gateway. If you follow the guide, you will get to know how you can connect a GSM modem with your personal computer and install the USB driver of the GSM modem. If you check the first figure below the text you will see that you need a GSM modem, a SIM card and an antenna. (Figure 1) The default package of the GSM modem includes a power supply and a USB cable; you will need them too. Please check the following steps to be able to connect your GSM modem to your computer.
1.) Put the SIM card
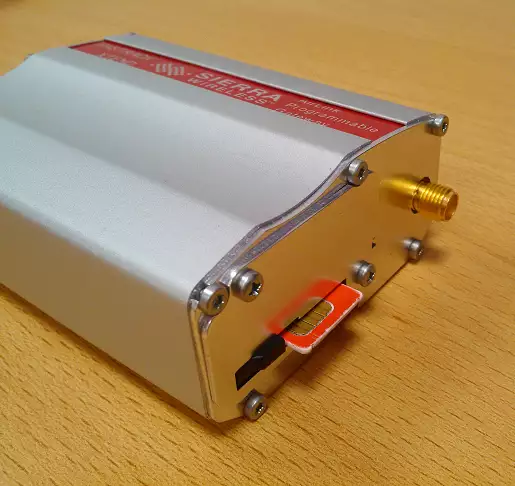
First you need to put your SIM card into your GSM modem as you see at Figure 2. You need to press and secure with the black close. Please check whether the SIM card has been inserted properly and whether it has been secured with the black lock. If you inserted your SIM card, you need to connect your GSM modem with a power supply.
2.) Connecting the power supply and the radio antenna.
The radio antenna is also included in the GSM modem package. You can easily connect the radio antenna to your GSM modem. Please check whether the antenna is connected properly. (Figure 3)
The final part of the hardware configuration is the connection of your GSM modem to your computer. Follow the next steps for setting up the GSM modem connection with your computer.
3.) Connecting your modem to your personal computer on USB port
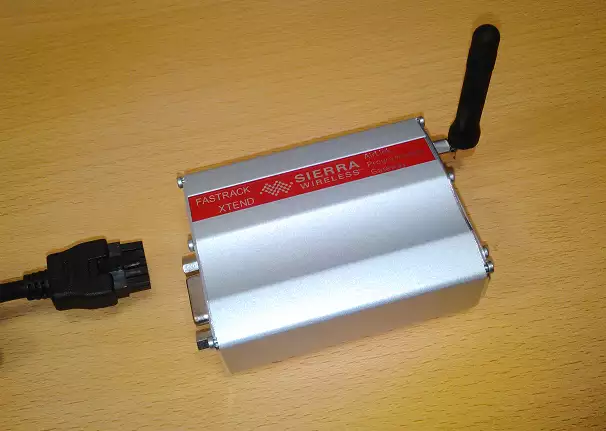
You have already connected the cables, the antenna and the SIM card to your modem, now you need to connect the USB cable to the GSM modem. The micro-USB is located under the power supply connector of the GSM modem. You need to connect the USB cable into your modem. (Figure 4)
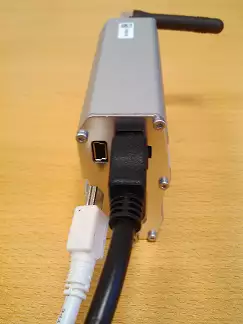
After you connected the USB cable you should configure and install the driver of the GSM modem to use this USB modem. The following steps will help you in the installation of the driver and after that you will find detailed information on how to connect your GSM modem with the Ozeki NG SMS Gateway. Please read the following steps.
4.) Installing the USB driver on your operating system
First you should download the following driver. If you have downloaded the driver, please open and run the driver to install and configure the modem. The opening window will pop up when you start the installation. (Figure 5)
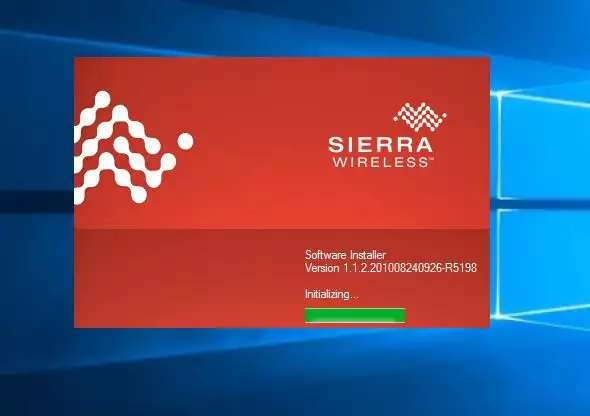
After the opening window, please click on the "Next" button to start the installation of the USB Driver. (Figure 6)
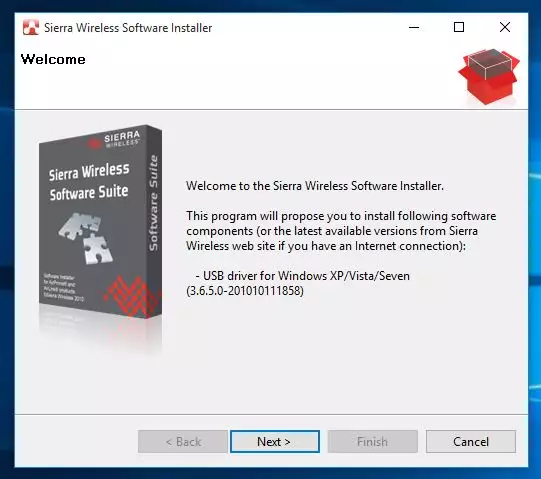
After you pressed the Next button, the installation will start. During the installation let the driver set and install the following packages. (Figure 7)
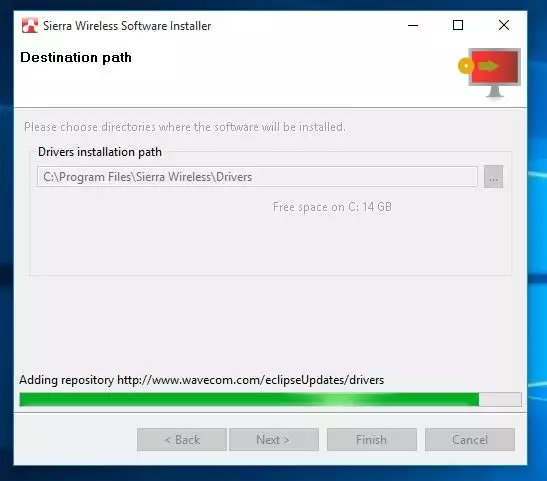
At the bottom of the next window please enable the USB driver "Items to be installed" checkbox and accept the license agreement. Click on the "Install" to finish the installation process.
Configuration in Ozeki NG SMS Gateway
After you installed your GSM modem you need to set the connection with the Ozeki NG SMS Gateway. In this topic you will find information on how to configure your GSM modem. Your GSM modem will be able to send and receive MMS messages using one of the following providers, please click on the "Add new service provider connection". You should set the GSM modem connection after you installed your GSM Modem. If you have a Sierra Wireless modem you can find an installation guide on this at the following webpage.
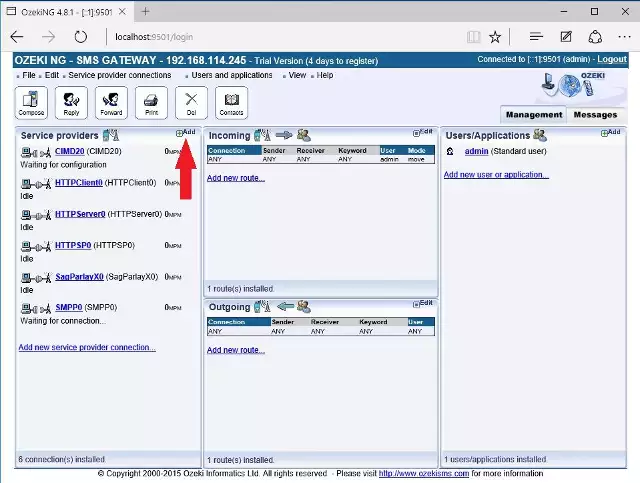
You can find this button below the Service provider connection title at the Management Console of the Ozeki NG SMS Gateway software. (Figure 8)
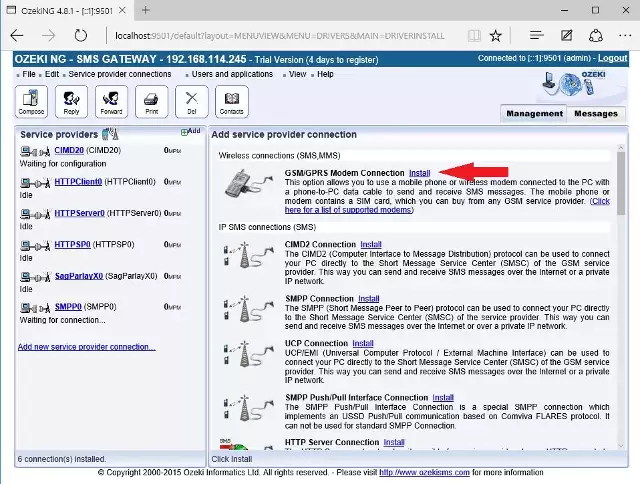
At the list of service providers you can find the GSM modem service provider connection. If you click on the "Install" button you can add this connection. (Figure 9)
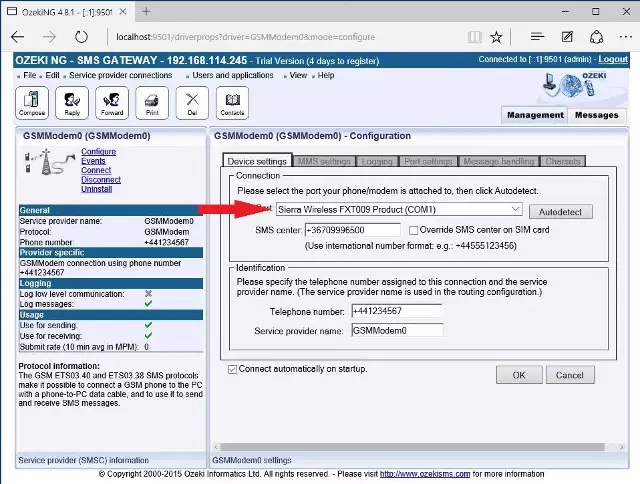
After that you should check which port belongs to your GSM modem. If you use serial connection, please select the port or you can check which port was assigned to the modem. Please visit the following page if you wish to check which port belongs to your modem. You need to select which port was assigned to your GSM modem. (Figure 10)
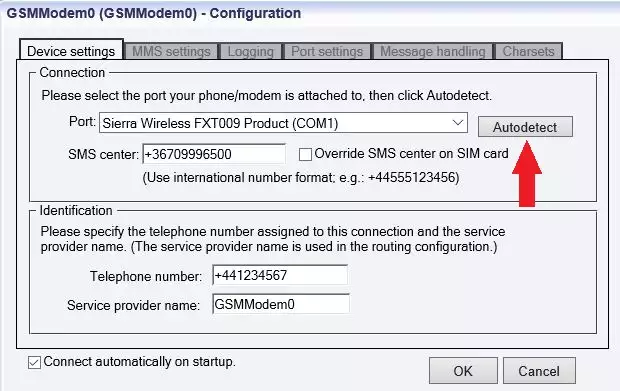
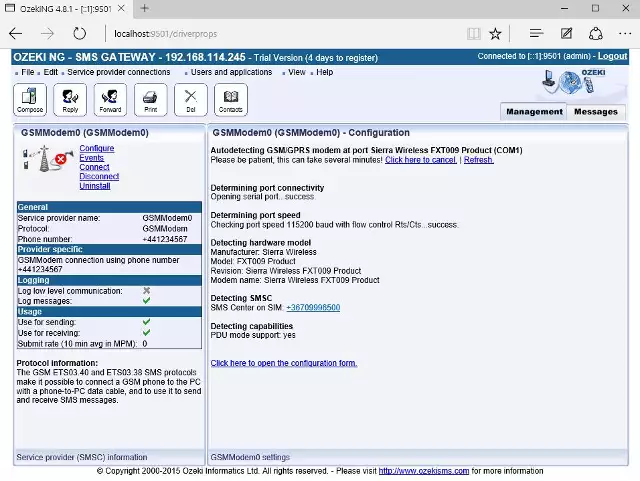
If you have already selected the port number, you should detect the connection with the "Autodetect" function to set up the connection with the GSM modem. (Figure 11)
If the connection was successful, you can see it at the "Detemining port connectivity". As you seen at Figure 12 the opening of the port was successful and the GSM modem was successfully connected to the Ozeki NG SMS Gateway software product.
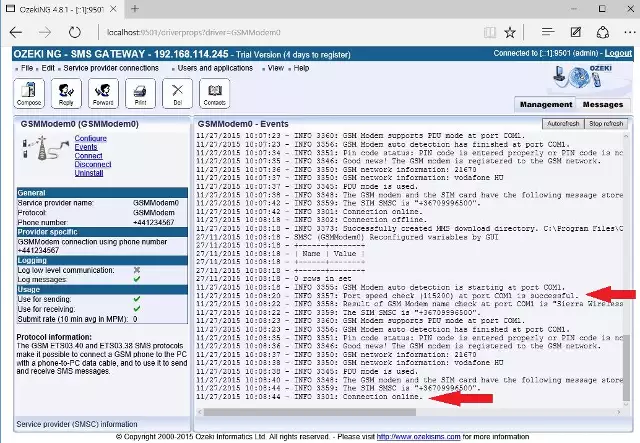
You can check the solution of the process if you click on the "Events" below the Configure button of the GSM service provider connection. As you seen the connection was successful and you cannot see the cross on the GSM icon. This means that the connection was established. (Figure 13)
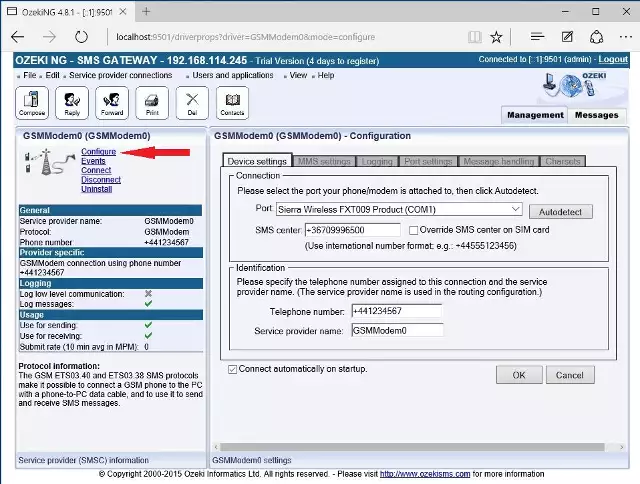
After the installation you need to configure the MMS settings, for MMS sending and receiving. Please click on the "Configure" link at the service provider connection. (Figure 14)
Please click on the MMS settings tab and Select your MMS service provider. Please look up your own service provider to establish the connection. You can find it in the premade list. After you select the service provider you will see the next screen in your configuration. (Figure 15)
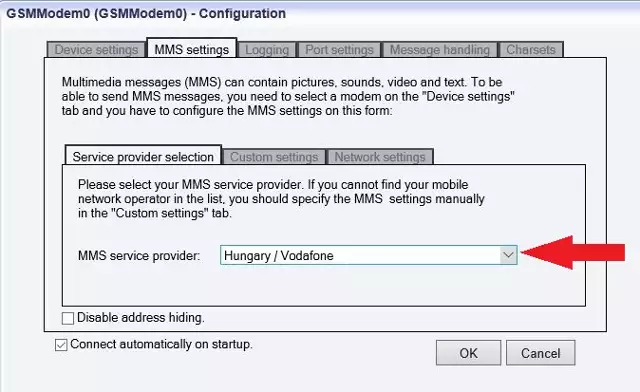
If your service provider allows "Disable address hiding" please click on it. Please note that custom settings are required if your service provider is not listed in the MMS Service provider combo box of the GSM Modem configuration form. If you cannot find your service provider on the list, please select the Custom settings in the dropdown list. (Figure 16)
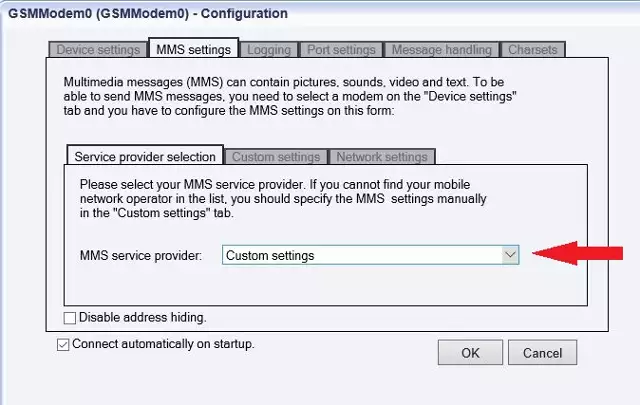
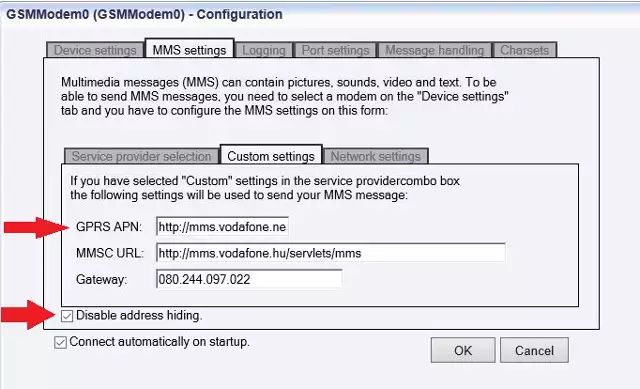
You need to provide the configuration parameters of your MMS service provider. You can find more "Custom settings" of the MMS service provider on the following website. At Custom settings tab you have to add GPRS APN, MMSC URL, Gateway settings. If you use custom settings, please set up Disable address hiding. (Figure 17)
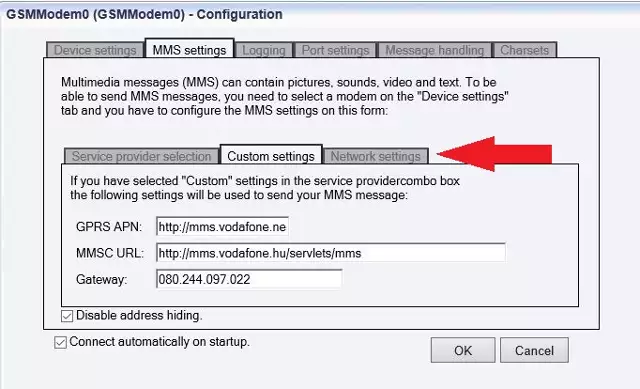
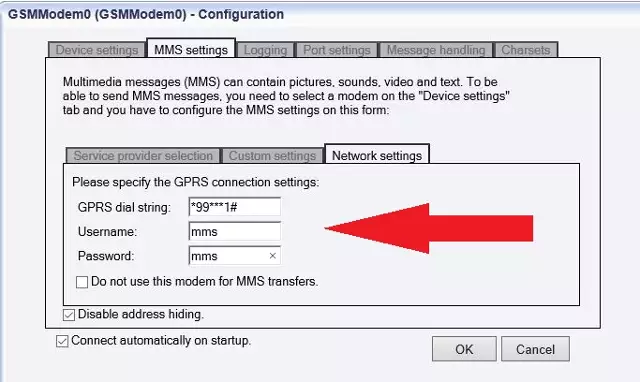
If your service provider requires username and password for the connection please click on the "Network settings" tab. Please ensure and check with your service provider that you provided the proper username and password fir sending and receiving MMS messages. (Figure 18)
After following the steps, you have already configured the password and username of the connection. This password and username were also provided by your service provider. (Figure 19)
You have already configured the connection for MMS sending and receiving the final part of this guide will help you in adding inbound and outbound routing rule and sending a simple MMS message.
Inbound routing for message receiving
In this part of the guide, you will find information on how can you set up routing rules to send and receive MMS messages. At the management console you can add the inbound and outbound routing rules. Please click on the add button and after that you should set up the inbound routing rules. (Figure 20)
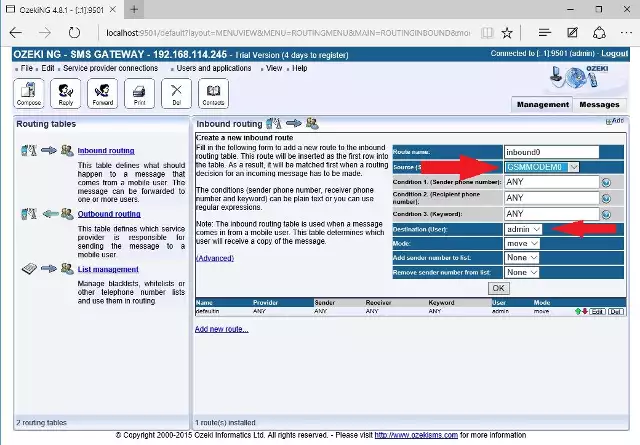
As you seen on Figure 20 you need to configure the routing from your GSM modem to your admin user. It can be another user, too. This user can be a standard user or a database user.
If you want to send MMS messages, too, outbound routing configuration is also necessary. You can also add a routing rule if you click on Management console outbound routing "Add" button. After that you need to add a filtering rule from admin or from another user to the GSM modem service provider. (Figure 21)
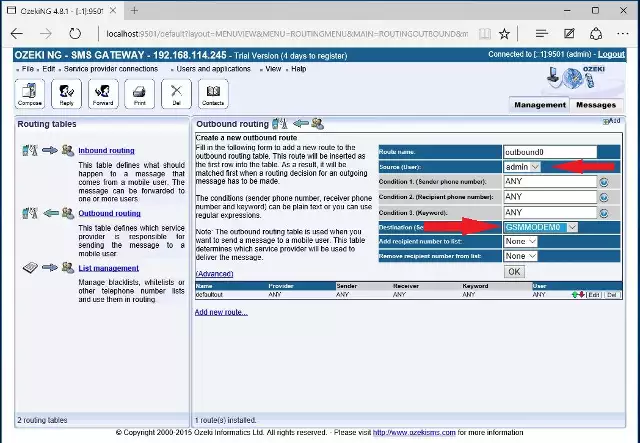
After you set the outbound routing rule, you can start to send messages to your recipients. In the next part of the guide, you can read about how you can send MMS messages.
MMS sending
You should test the MMS sending if you go back to the Management Console. There you can find the Compose button at the right corner of the screen. If you click on the Compose button, you will see the composer window where you can set up the MMS type. Please click on the "Compose button". (Figure 22)
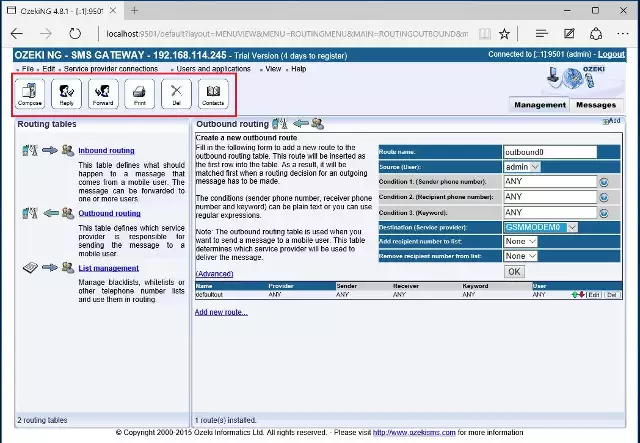
If you clicked on the Compose button you can start to write your MMS. Please select the Multimedia message (MMS) to be able to send MMS messages. (Figure 23)
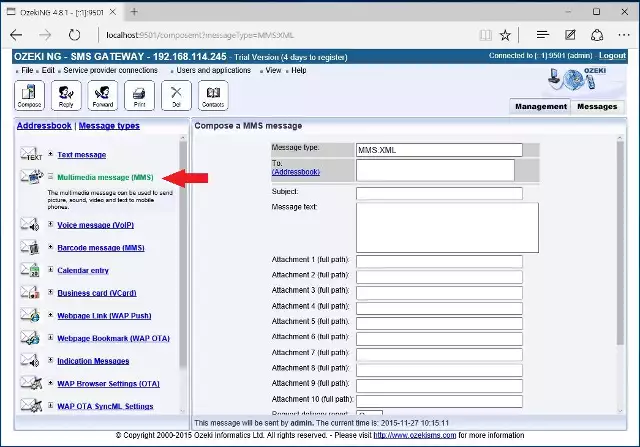
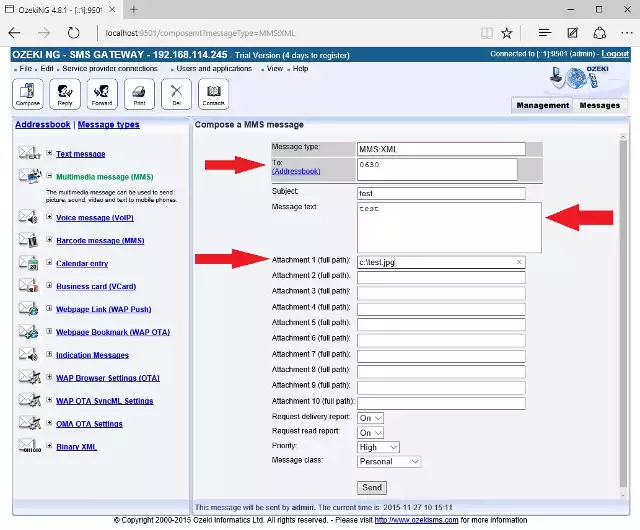
Please add the recipient number, subject, message text and the full path of the picture which you want to attach. (Figure 24) Please click on the "Send" button after you provided the MMS sending requirements. Before you send the MMS, please disable your firewall to send and receive MMS messages!
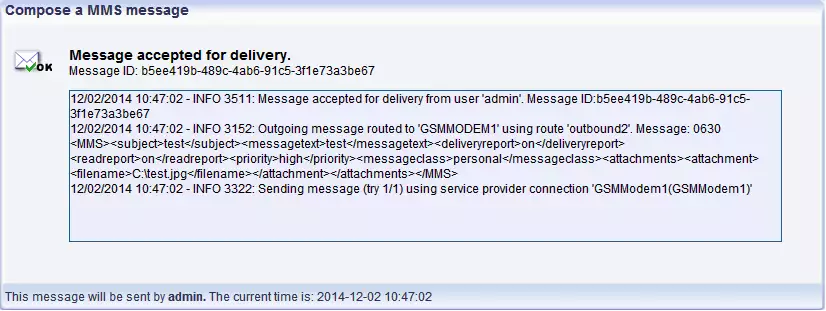
You will see the log of the sending, if the sending was successful you will receive the MMS message on the telephone of the recipient. (Figure 25)
Conclusion
To summarize the above mentioned, you can send MMS messages with the Ozeki NG SMS Gateway software product through the Sierra Wireless Fastrack GSM modem from computers to mobile phones. To achieve this function, you can easily configure your Gateway in a few steps. With this solution you will gain a stable, reliable and well-functioning system which you will be able to save time and money with.
