Connecting to modems using COM ports via Ethernet
It is possible to share devices using serial ports via ethernet by using a rather simple software called Serial to Ethernet Connector. This solution is good when you have a single computer with a device attached to it using a serial port, and you want to share this device to other computers (or virtual machines) via an ethernet network. With this solution, you can share a GSM modem to other computers in a network so they can control it as if they have the modem connected directly to them.
You can download Serial to Ethernet Connector here: Serial to Ethernet Connector. There are other many other software for this case, but this guide will demonstrate the solution using the above software.
Also, we will use a Sierra Fastrack modem. Installation guide for this type of modem is available here: Installation of a Sierra Fastrack modem.
Using other software/modems are very similar.Understanding the concept
Say, you have a device (or devices) connected to one of your computers. You want to share this device over network, so other computers (e.g. virtual machines) can control the device attached to your computer as well. This way, you can turn the computer with the attached serial device into a server, sharing the COM port used by the device over network. Client computers (e.g. virtual machines) can connect to the server machine and use the device as if it was attached directly to those computers. In this case, we want to set up a connection, so the server machine will have the GSM modem connected, and the clients will use that modem to send SMS messages from Ozeki NG SMS Gateway running on them.
Installing and configuring Serial over Ethernet Connector
First, you need to install Serial to Ethernet Connector on the machine you will use as the server - this machine has the serial device attached. After the installation, launch the program, and create a server connection.
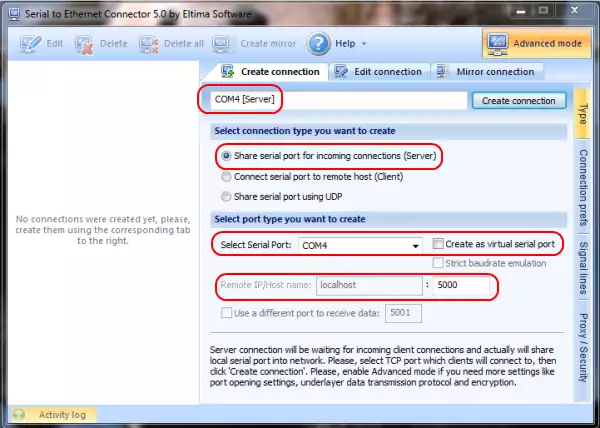
You have to give the connection a name - this can be anything. In the connection type radio buttons, you must select Share serial port for incoming connections (Server). Under that section, select the serial port which has the device connected to - we have the Sierra Fastrack modem on COM4. Leave the Create as virtual serial port checkbox unchecked. Next, specify the TCP port which you want to use for receiving data (Figure 1).
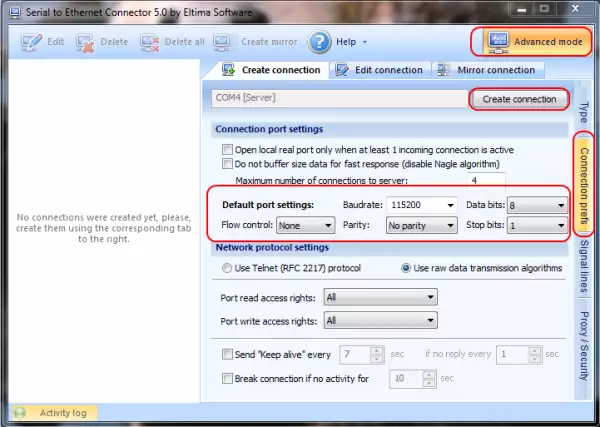
Note, that we are in Advanced mode - you can enable advanced mode by clicking the button on the top right corner. This is a must, because you have to specify some connection preferences in order to use the device correctly. Click on the Connection prefs menu and specify port settings appropriate for your modem. Note, that we have all the checkboxes unticked (Figure 2). Click on Create connection on the top to create this connection.
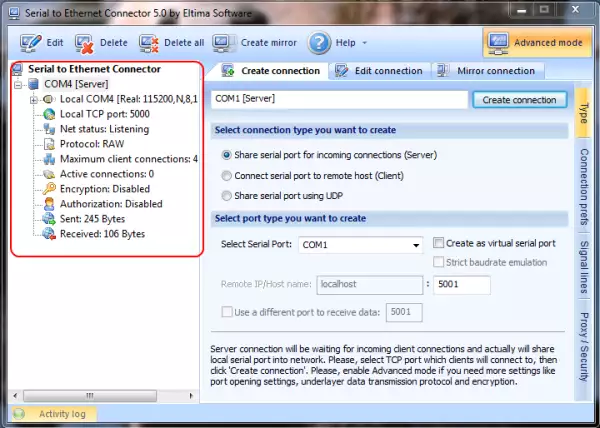
After creating the connection, you can see it running on the left side of the window (Figure 3).
The next step is to install and launch Serial to Ethernet Connector on the client machine(s). These machines will include an Ozeki NG SMS Gateway running, too. After launching Serial to Ethernet Connector, create a Client connection.
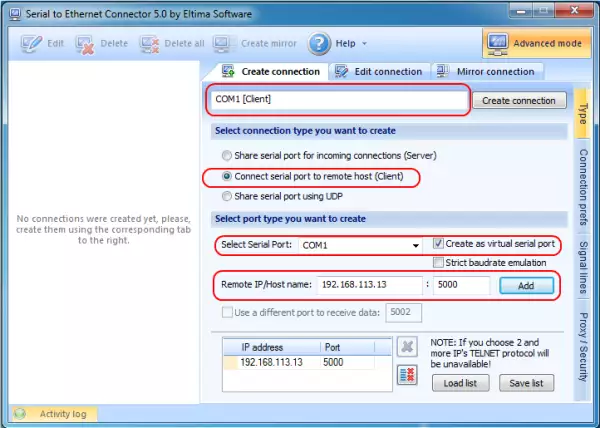
You also need to specify a name for it, and after that, click on the Connect serial port to remote host (Client) radio button. Under that section, select a serial port you will use for the connection - this will be a virtual serial port, so check the Create as virtual serial port checkbox. In this case, we will use COM1. Under that, specify your server's IP/Host name, and the TCP port used for the connection (5000 now). Please note, that you may have to configure your machines' firewalls properly to have Serial over Ethernet Connector working. Click on Add (Figure 4).
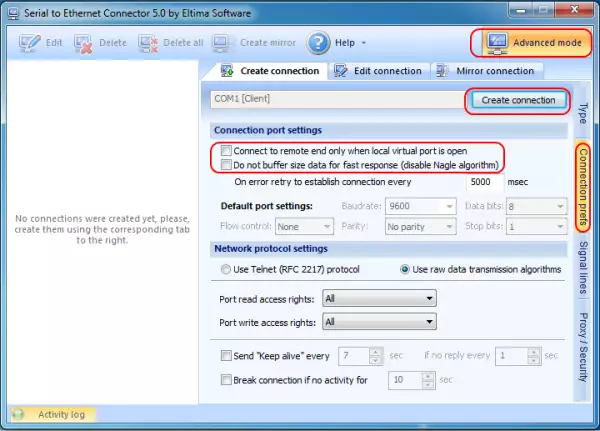
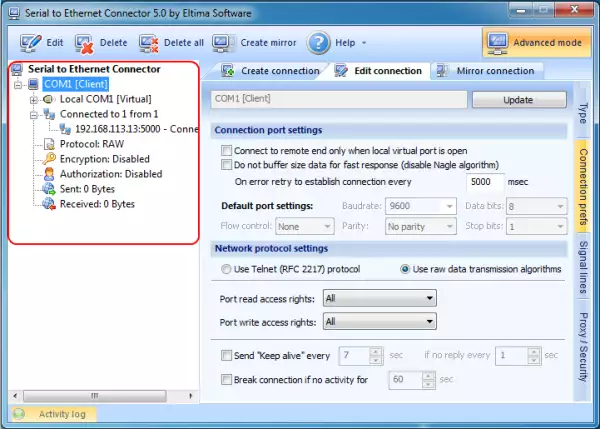
You also need to enable Advanced mode by clicking the button on the top right corner. Move on to the Connection prefs menu, and make sure, you have all the checkboxes unticked. Click on the Create connection button on the top. Now you have a working connection between your server and a client (Figure 5 and Figure 6).
Testing the shared device
You have a working connection between your client and your server now. Your server has a GSM modem attached, and your client has Ozeki NG SMS Gateway installed. You can send an SMS from your client machine using the GMS modem attached to your server machine.
Enter Ozeki NG SMS Gateway on the client and add a new service provider connection. Install a GSM/GPRS Modem Connection. In the configuration menu of this service provider, select the virtual port used by your client machine (configured in Serial over Ethernet Connector running on the client machine). We are using COM1. Click on the Autodetect button (Figure 7).

If you configured everything properly, Ozeki NG SMS Gateway will recognize your modem as if it was attached to your client machine directly (Figure 8).
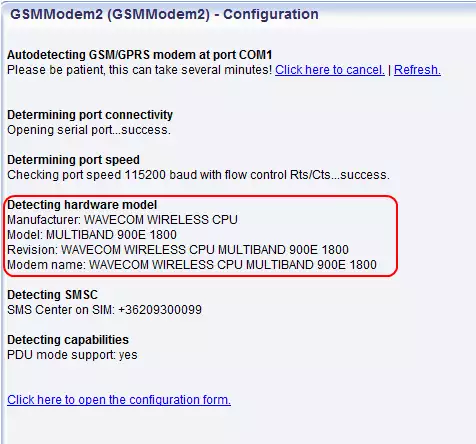
You can begin sending SMS messages using the device connected to this client machine (Figure 9 and 10).
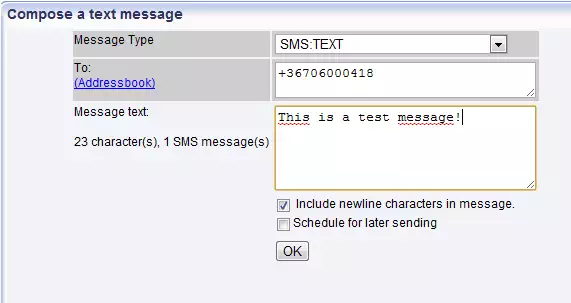
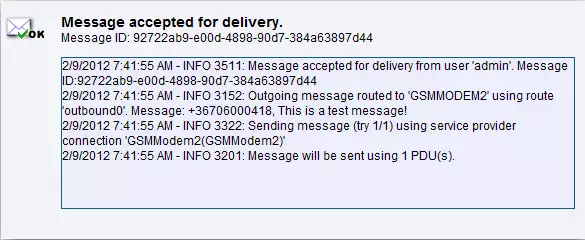
In the GSM modem's log, you can check the message sent (example below).
2/9/2012 7:41:55 AM - INFO 3322: Sending message (try 1/1) admin;SMS:TEXT;
	92722ab9-e00d-4898-90d7-384a63879d44;admin; +36706000418;This is a test message!;
	using service provider connection 'GSMModem2 (GSMModem2)'
2/9/2012 7:41:55 AM - INFO 3201: Message will be sent using 1 PDU(s).
2/9/2012 7:42:01 AM - INFO 3323: PDU (1/1) accepted by SMSC with message reference: 000418:197
2/9/2012 7:42:01 AM - INFO 3327: Message successfully sent. Reference: 000418:197
For more information, please contact us at info@ozekisms.com.
