How to connect to the service provider via VPN using SMPP - Built-in VPN Client of Windows (PPTP MPPE VPN)
The example guide below demonstrates how you can create an SMPP connection in Ozeki NG SMS Gateway to connect to the service provider via VPN. In this case the VPN connection will be ensured via the built-in VPN client of Windows.
VPN refers to Virtual Private Network. VPN enables you to connect
to the remote computers of a remote network via encrypted channel over the
Internet. Since it uses encrypted channel, VPN connection ensures safety.
If you connect to the remote computers of a remote network you can use your PC
as if it would be the part of the remote network.
There are various ways to be connected to a remote network via VPN. In this example, you
will find a guide about using the built-in VPN client of Windows.
The built-in VPN client of Windows uses PPTP (Point to Point Tunneling Protocol)
protocol with MPPE (Microsoft Point to Point Encryption) encryption, by default.
To be able to connect to a remote computer with this built-in VPN client, the
remote computer also needs to run a VPN server that supports PPTP protocol with
MPPE encryption. It can also be an other PC running Windows.
In this example, you will learn how to create an SMPP connection in Ozeki NG
SMS Gateway to connect to a service provider via VPN connection if the
service provider ensures VPN connection also via PPTP protocol with MPPE
encryption.
Configuration guide
It is assumed that you have already received the necessary data from your service provider:
- username and password that is required for VPN connection
- IP address, port number, username and password that is required for SMPP connection
- Ozeki NG SMS Gateway has already been downloaded and installed on your PC
Step 1 - Create VPN connection
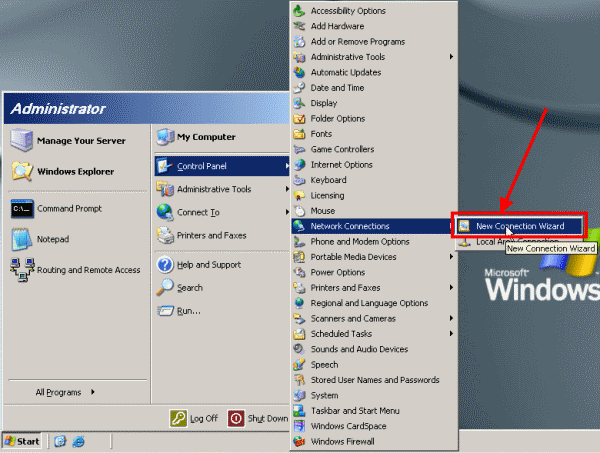
Select Start/Control panel/Network Connections/New connection wizard menu item (Figure 1).
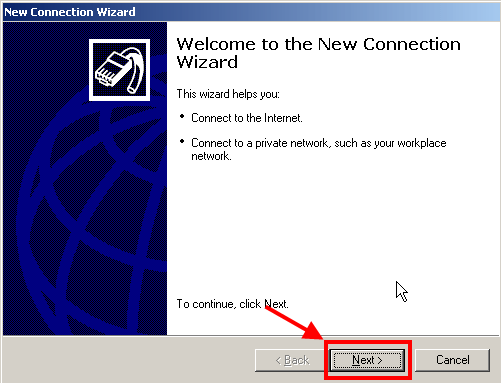
On the appeared welcome panel click on Next (Figure 2).
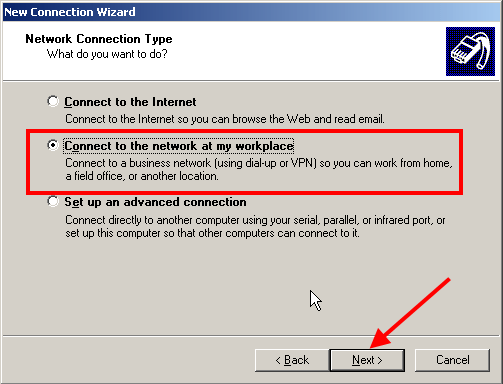
On Network Connection Type window select Connect to the network at my workplace option and click on Next (Figure 3).
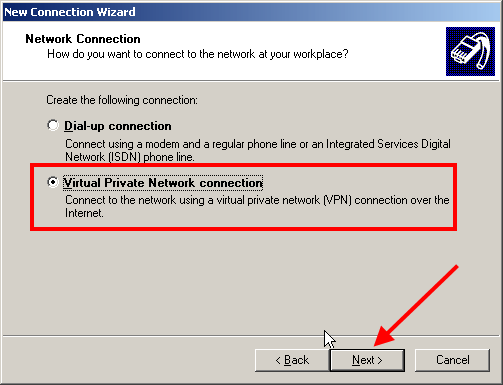
On Network connection window select Virtual Private Network connection option and click on Next (Figure 4).
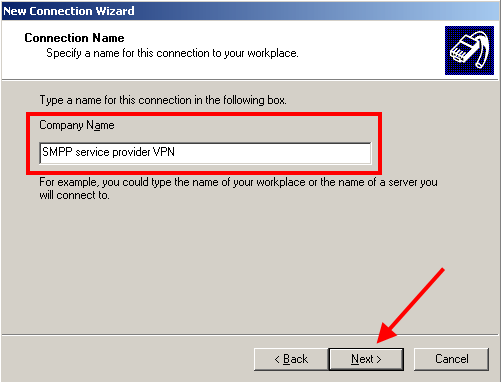
On Connection Name window provide an optional name for the created connection at Company Name field and click on Next (Figure 5). For example, SMPP service provider VPN.
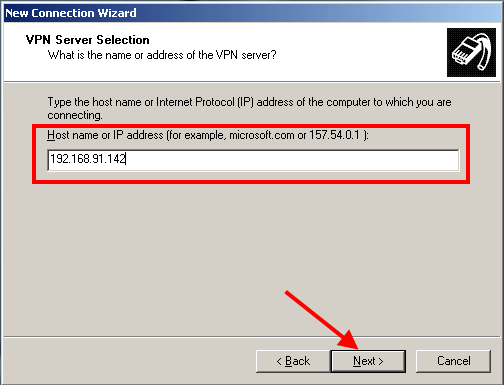
On VPN Server Selection window specify the IP address or host name of the VPN server and click on Next (Figure 6).
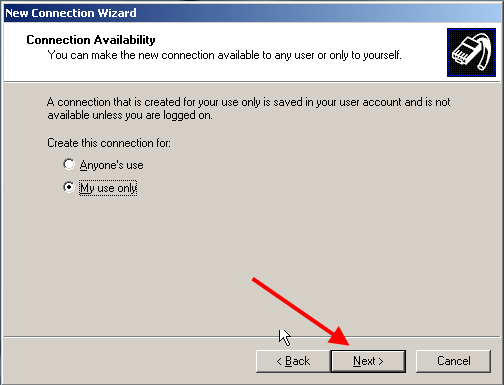
On Connection Availability window you can leave the options default and click on Next (Figure 7).
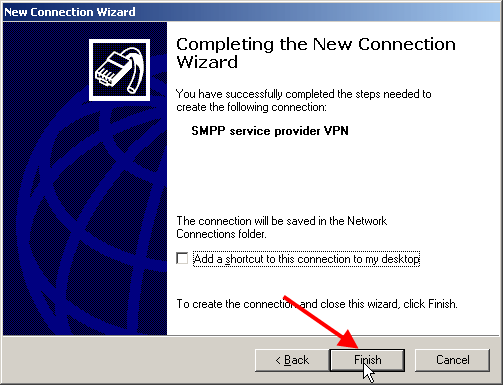
Finally click on Finish to save changes (Figure 8).
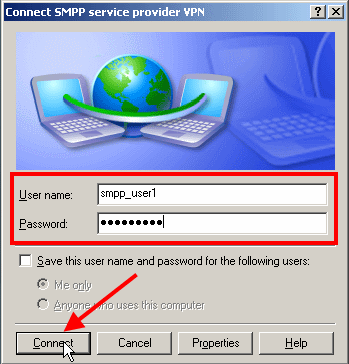
On the appeared window enter the Username and Password you have received from your service provider for creating VPN connection (Figure 9). Then click on Connect. (You can also reach this window from Start/Control panel/Netwok connections/Connection name).
If the connection is successful, an icon appears on the notification area of the tray and a message demonstrates that you are connected (Figure 10).

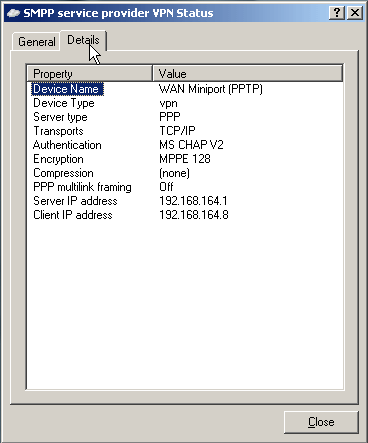
If you click on the message demonstrating that you are connected, you can see the status of the VPN connection (Figure 11).
Step 2 - Create an SMPP service provider connection in Ozeki NG
Start Ozeki NG SMS Gateway software (Figure 12) and login.

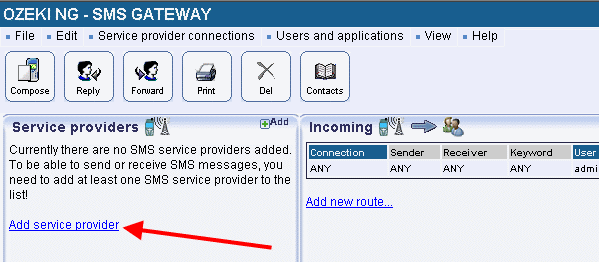
Click on Add service provider (Figure 13).
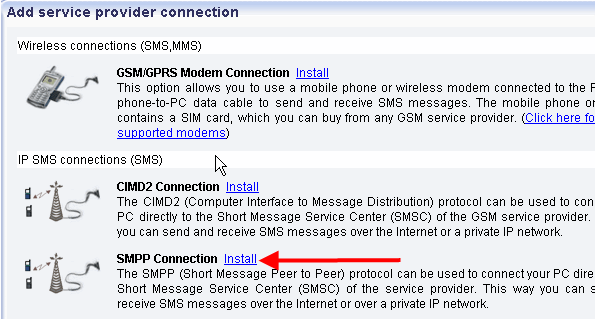
Select SMPP connection from the list and click on Install next to it (Figure 14).
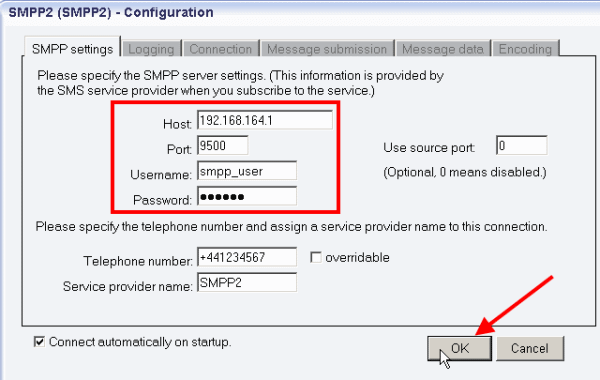
You can set the created SMPP connection on the configuration
panel. On SMPP settings tab you need to specify the SMPP server settings
(Figure 15). The required information has been provided by your service provider
when you subscribed to the service:
Host: the IP address of the SMPP server of the service provider
Port: port number
Username: the username you received from the service provider to use its
service
Password: the password you received from the service provider to use its
service
To save settings, click on OK.
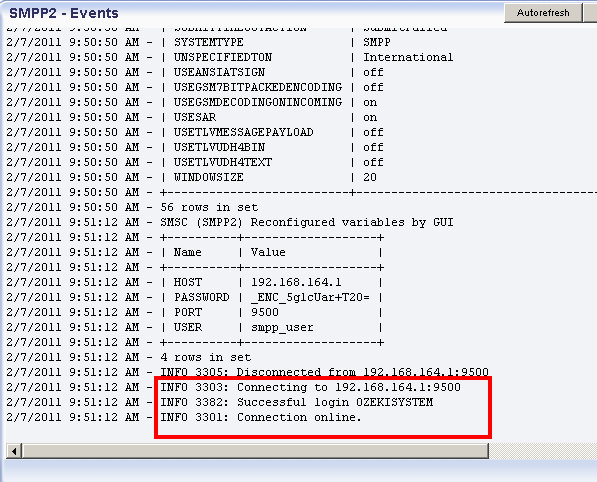
In Events menu of the created SMPP connection you can check the connection. If it has been successful it shows: Connection online
Step 3 - Send a test message
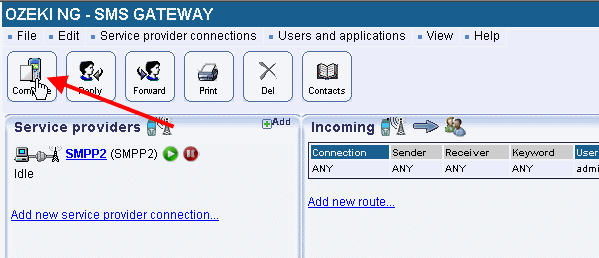
After configuration, I sent a test message to test the connection. For sending a test message, click on Compose (Figure 17).
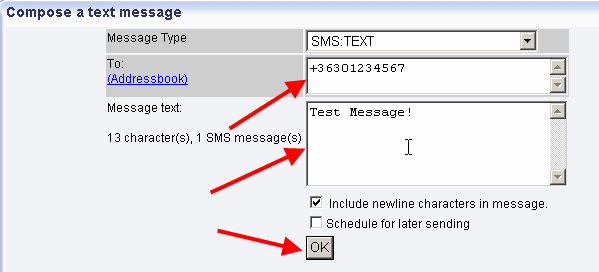
Specify the message type, the recipient, compose the body of the message and click on OK (Figure 18).
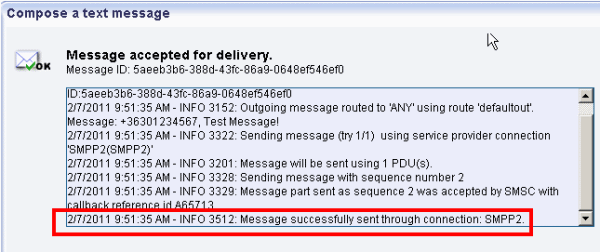
Then the message is accepted for delivery. You can see on Figure 19 that the message has been successfully sent through SMPP connection.
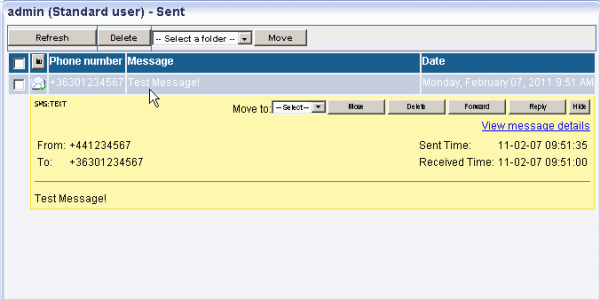
In Ozeki NG SMS Gateway you can see the sent test message in Sent folder (Figure 20).
Dig deeper!
People who read this also read...
SMPP connection configuration
Quick start guide
