How to send SMS from shared files (shared by network drivers) with File user of Ozeki NG SMS Gateway
On this page you can find the step-by-step configuration guide on how to send SMS messages from shared files with the File user of Ozeki NG SMS Gateway.
To create this solution first you need to configure Ozeki NG SMS Gateway software to be able to send SMS messages from your PC. You can find step-by-step guide at:
Quick start guide. The Ozeki SMS software is able to connect to the mobile network either with a GSM modem connection or IP SMS connection.After you have configured your Ozeki NG SMS Gateway software and you can also install a service provider connection to connect the SMS software to the mobile network.
On how to send SMS messages from the File user of Ozeki NG SMS Gateway please read the following page: How to send SMS from a Text file.
Configuration guide
After you have configured Ozeki NG SMS Gateway software you can start the configuration process for sending SMS from shared files.
The main configuration steps will be the follows:
- Stop Ozeki NG SMS Gateway service in Services window
- Disable Simple File Sharing option at Folder options menu
- Go to the installation folder of Ozeki NG SMS Gateway
- Select Properties of Ozeki NG SMS Gateway
- Add a NETWORK SERVICE user at Security tab
- Go to Properties of Ozeki NG SMS Gateway in Services window
- On Log On tab, it needs to set the NETWORK SERVICE user
- Open Groups menu at Local user and Groups window
- Right click on Administrators and select Add to group menu item
- Add NETWORK SERVICE user
- Start Ozeki NG SMS Gateway service
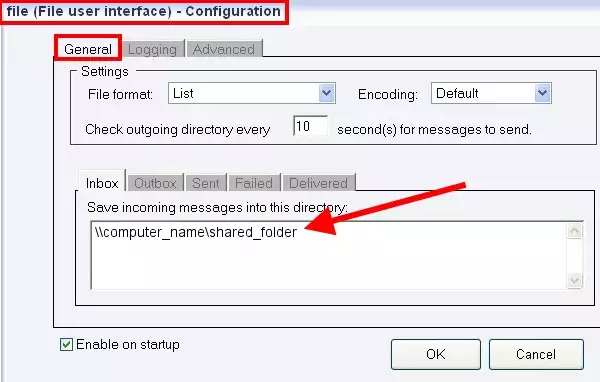
- Specify the network path that is set to the driver in Ozeki NG SMS Gateway: \\computer_name\shared_folder
Now please follow the step-by-step configuration guide below:
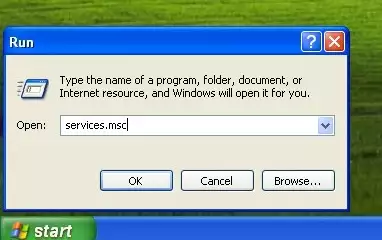
First, start to run Services (Figure 1).
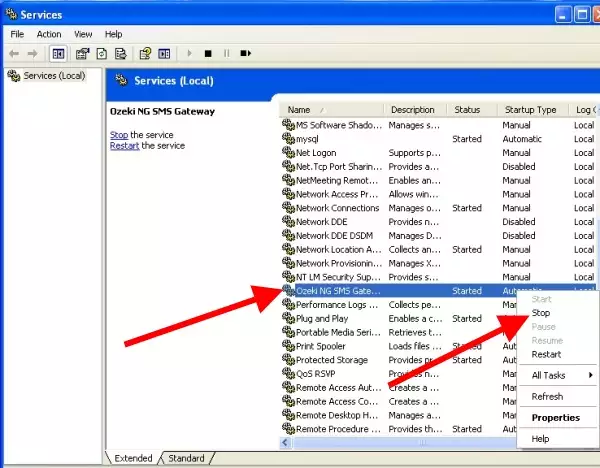
Stop Ozeki NG SMS Gateway service (Figure 2).
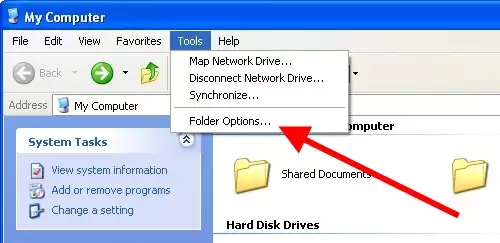
In Tools menu select Folder Options... Figure 3).
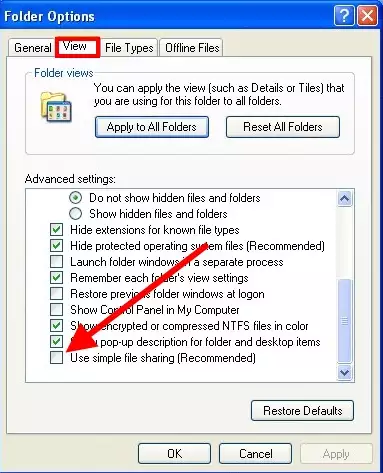
Click on View tab and disable Use simple file sharing option (Figure 4).
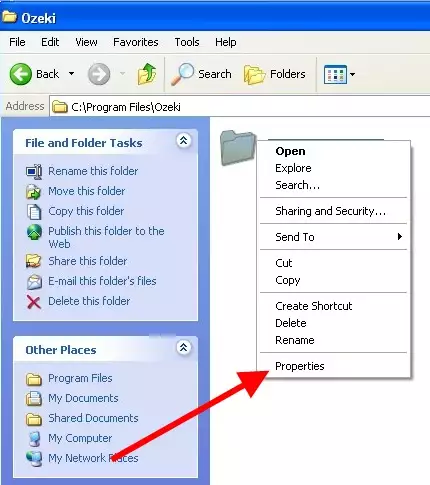
Now go to the installation folder of Ozeki NG SMS Gateway. Right click on this folder and select Properties (Figure 5).
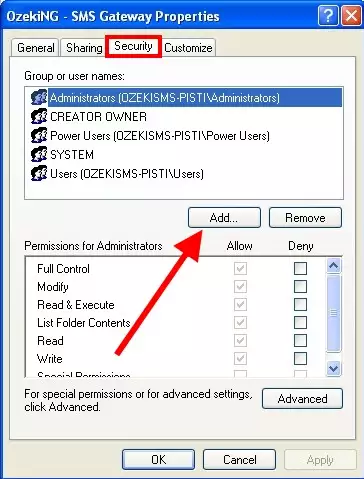
In Ozeki NG SMS Gateway Properties window select Security tab and click on Add button to add a network service user (Figure 6).
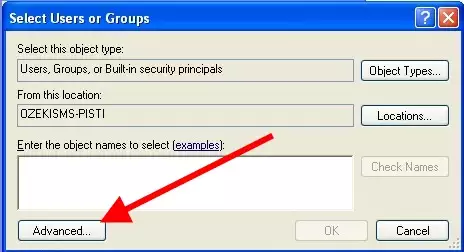
Then click on Advanced (Figure 7).
Click on Find now (Figure 8).
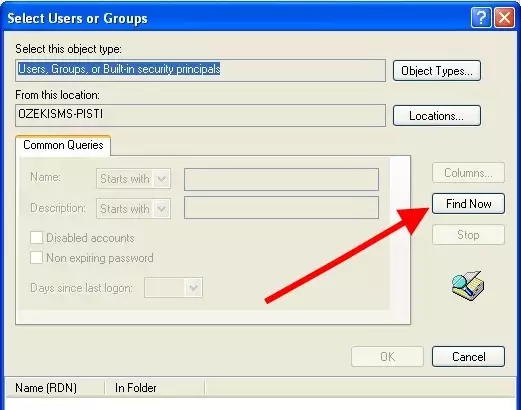
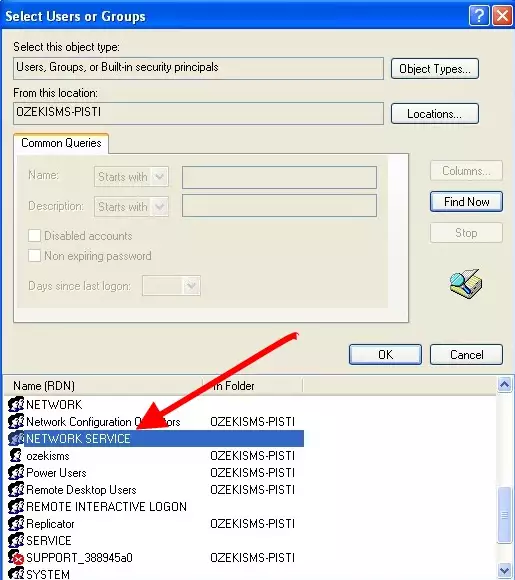
Select Network service in the list and click on OK (Figure 9).
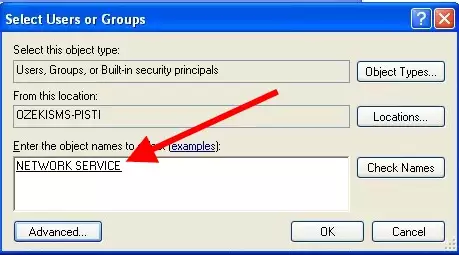
Click on OK again (Figure 10).
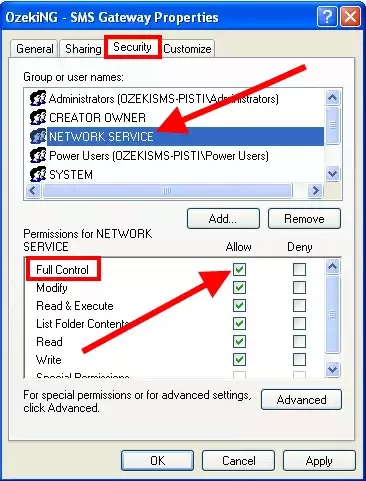
You can see that Network Service appeared in the list. Enable Full Control checkbox that will enable the other options below automatically. With this step you provide permission to this Network Service user to get access to the folder of Ozeki NG SMS Gateway (Figure 11).
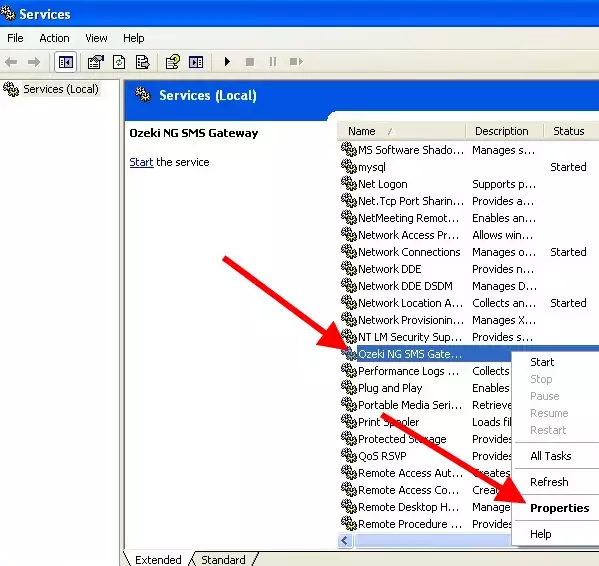
Go to Services window and right click on Ozeki NG SMS Gateway. Click on Properties option (Figure 12).
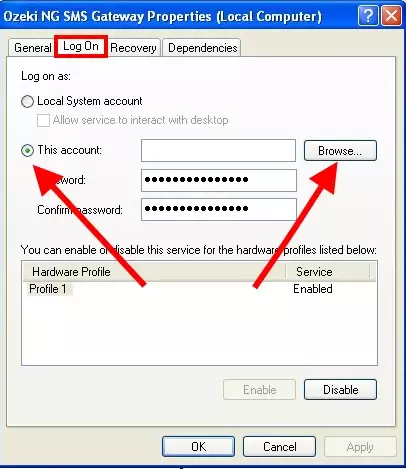
On Log on tab of Ozeki NG SMS Gateway Properties window enable This account option. In this way, the browse button will be active so click on this browse button (Figure 13).
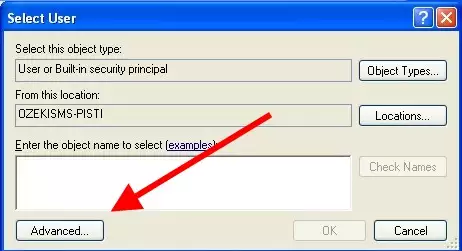
Click on Advanced option (Figure 14).
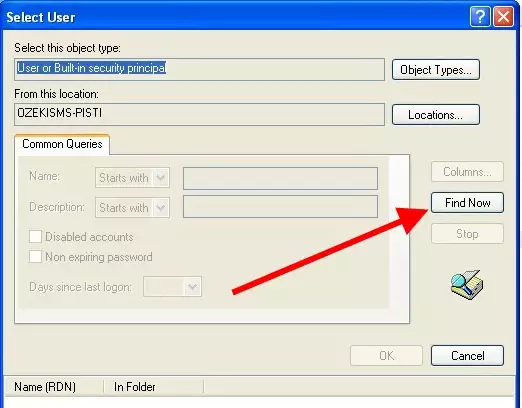
Click on Find now (Figure 15).
Select Network Service in the list and click on OK (Figure 16).
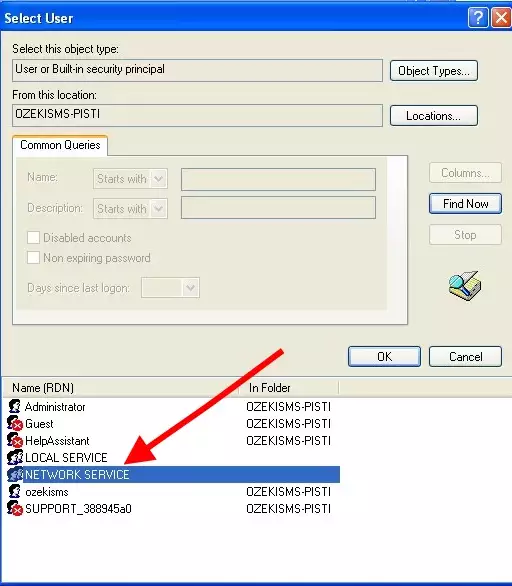
Click on OK again (Figure 17).
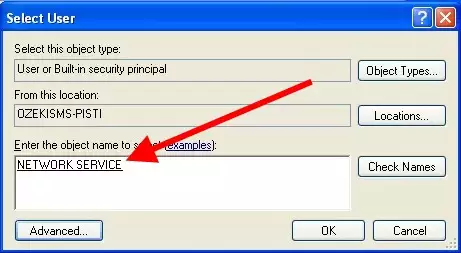
On Log on tab of Ozeki NG SMS Gateway Properties window please make sure that Password and Confirm password field is NOT filled. Click on OK (Figure 18).
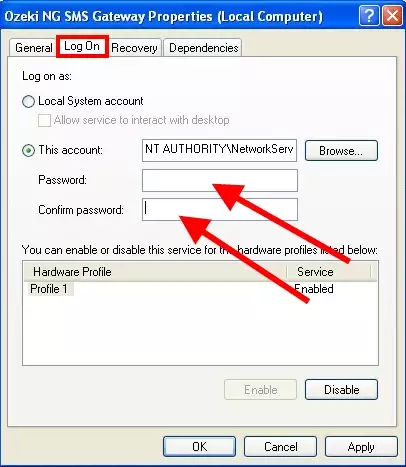
Start Local User Manager (Figure 19).
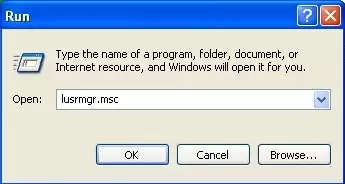
Select Administrators from Groups menu. Right click on Administrators and click on Add to group... (Figure 20).
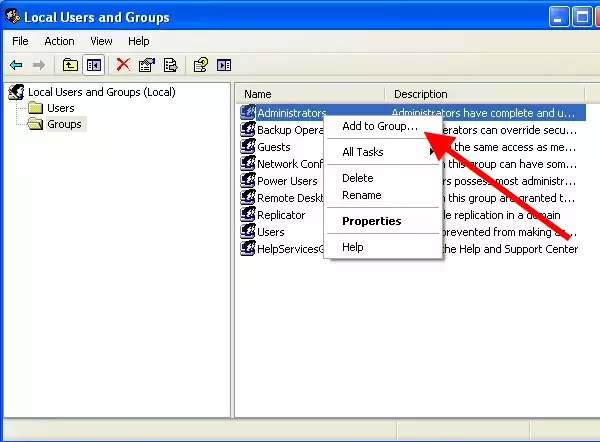
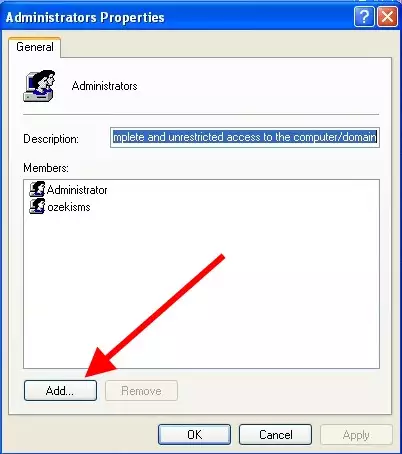
In Administrator Properties window click on Add button (Figure 21).
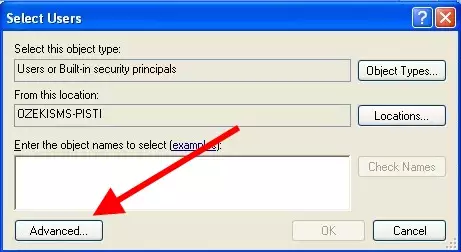
Add the Network Service user: Click on Advanced (Figure 22).
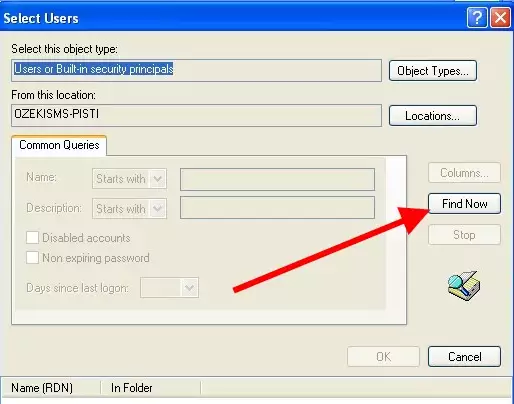
Click on Find now (Figure 23).
Select Network Service in the list and click on OK (Figure 24).
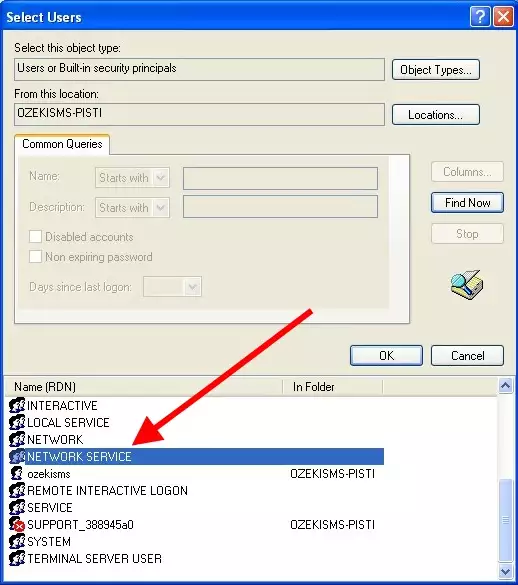
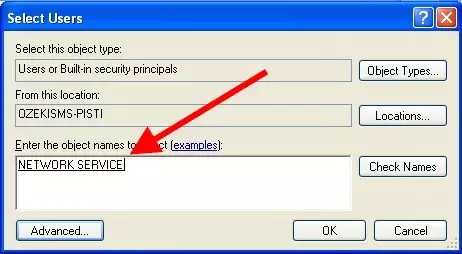
Click on OK again (Figure 25).
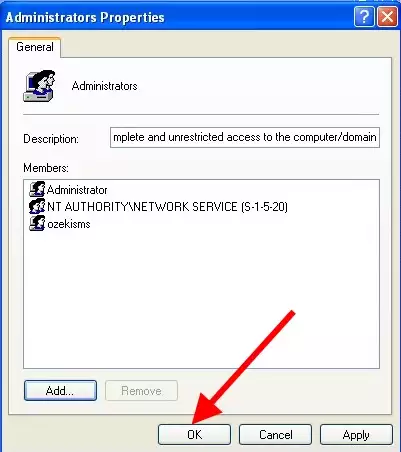
On Administrators Properties window also click on OK (Figure 26).
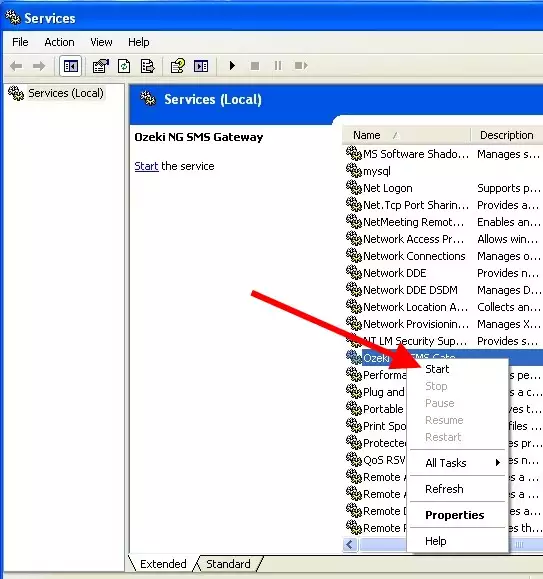
Finally, start Ozeki NG SMS Gateway service in Services window (Figure 27).
Specify the path to the network folder on the Configuration panel of File user in Ozeki NG SMS Gateway (Figure 28).
