Connect Ozeki Phone System to Ozeki NG SMS Gateway.
Connecting Ozeki Phone System to Ozeki NG SMS Gateway creates an exceptionally compatible and all-round communication solution. The software sends alert from any records, calls or errors to the devices chosen by the user in E-mail, SMS or phonecall format. With the solution the users are in a sequential connection with their company. As a result they can be informed first hand about the alteration in their industry.
Ozeki NG SMS Gateway is going to be connected to Ozeki Phone System through an SMPP connection. In this network the PBX sends out the data to SMS Gateway in an SMPP then the Gateway forwards the message through the chosen service provider to the final users mobile device.
Step 1 - Adding SMPP connection to Ozeki NG SMS Gateway
There is an option to add users and providers or set up routes on the GUI of the SMS Gateway. To be able to connect the PBX you have to add that as a user to the SMS Gateway.
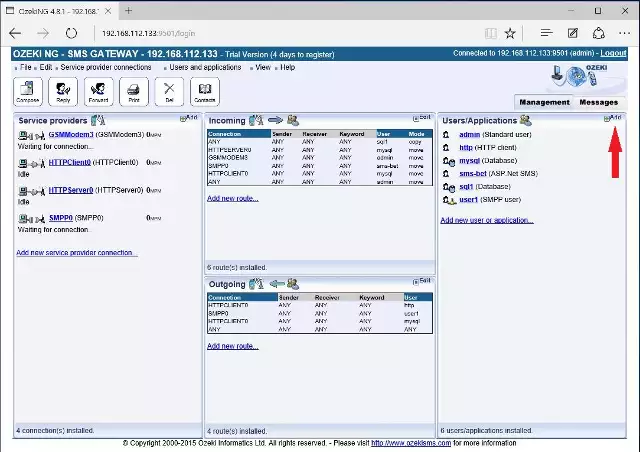
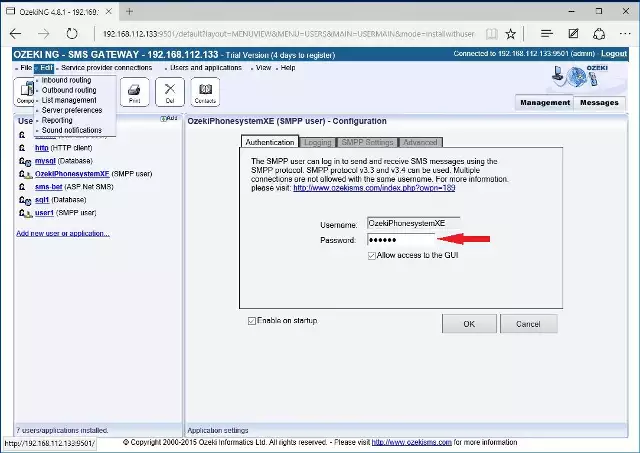
While installing an SMPP connection you have to add the unique username and password for the connection. Such data are generated by the user. Note: The PBX will use the login data to connect to the SMS Gateway.
Step 2 - Setting up outgoing/outbound route.
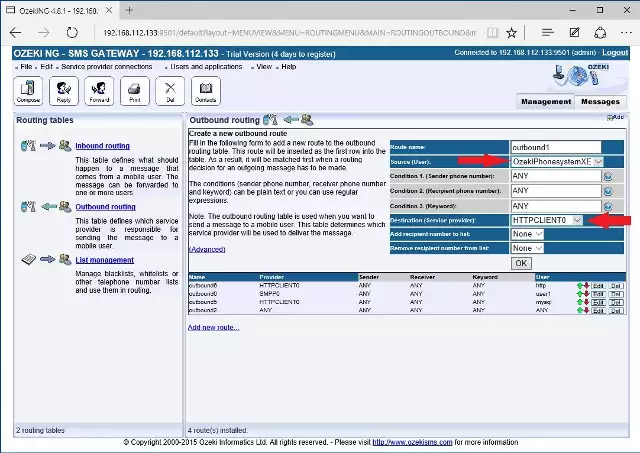
As a next step you have to set up a routing route which determines which service provider should send out the SMS messages depending on the source of the message. The rule can be set up on the GUI of the SMS Gateway.
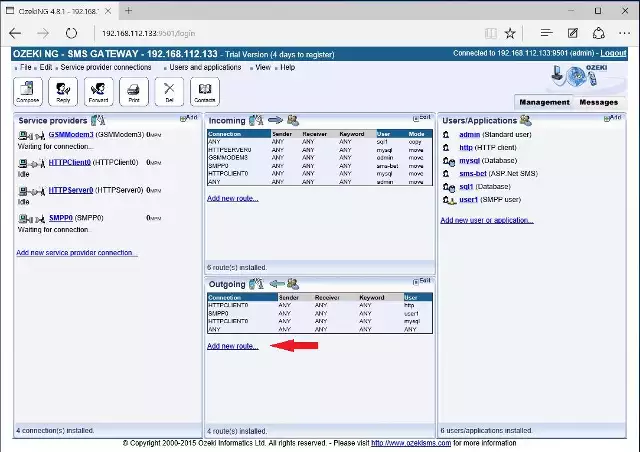
While defining the route you have to add the name, the source, the condition and the destination of the rule. In our example , Ozeki Phone System will be the source and the destination will be one of the Hungarian service providers (e.g.: T-mobile, Telenor, Vodafone).
Step 3 - Creating an SMPP connection in the Ozeki Phone System software.
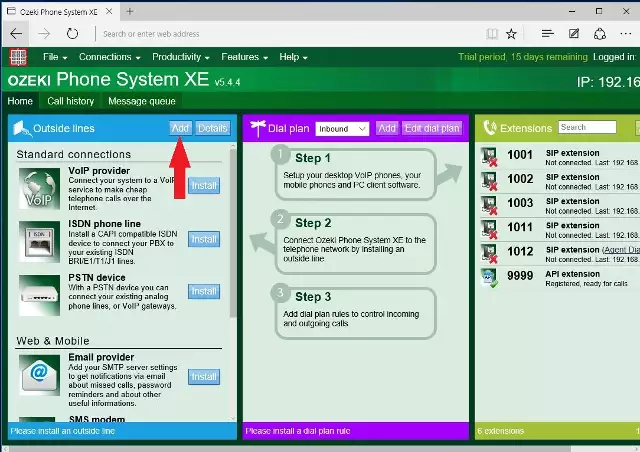
After you finished configuring Ozeki SMS Gateway, the configuration of Ozeki Phone System is the following. First, you have to create a connection point between the two software. You can create this by adding an Outside line in the GUI of Ozeki Phone System.
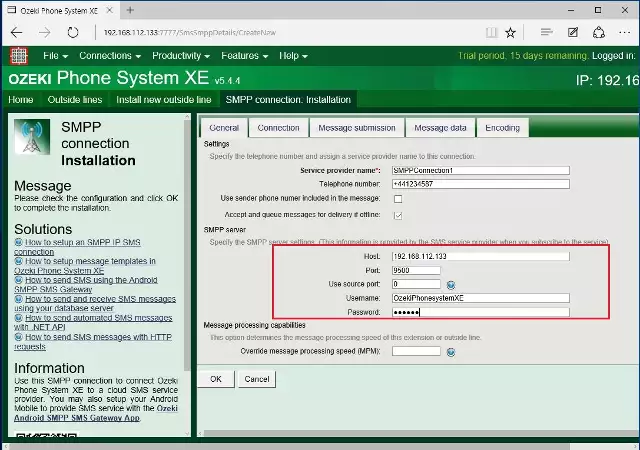
Just like in the SMS Gateway, you have to add an SMPP connection in the PBX software. At the connection data you have to provide the following information: IP address, Port number, Username and password used in the SMS Gateway.
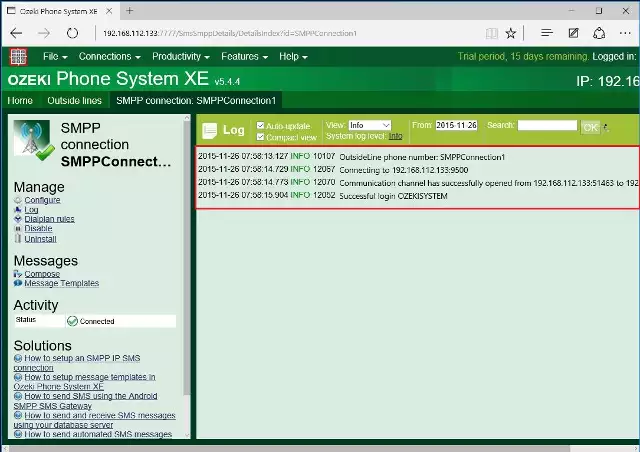
By clicking on the log button, the user can see in the details that Ozeki Phone System successfully connected to the SMS Gateway.
Step 4 - Creating a dial plan
As in the SMS Gateway, you have to create a routing rule in the PBX. You can create this by clicking on Add in the dial plan.
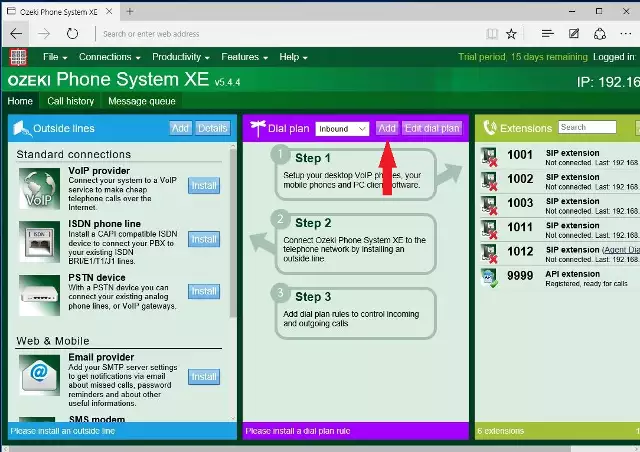
The dial plan defines where the PBX should send the data. In the settings of the connection you can add source, conditions and destinations. As a destination, you have to choose the SMPP connection so that the PBX will send out the data to the SMS Gateway.
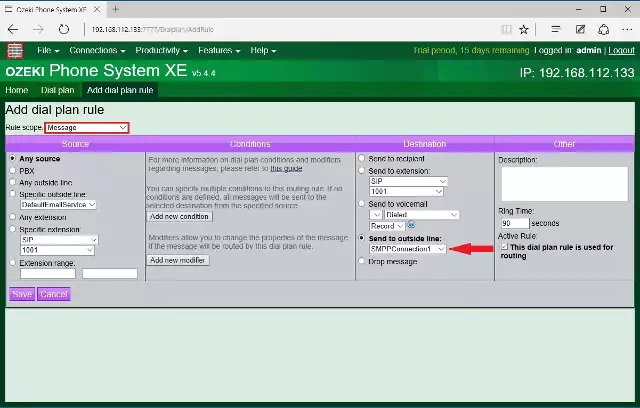
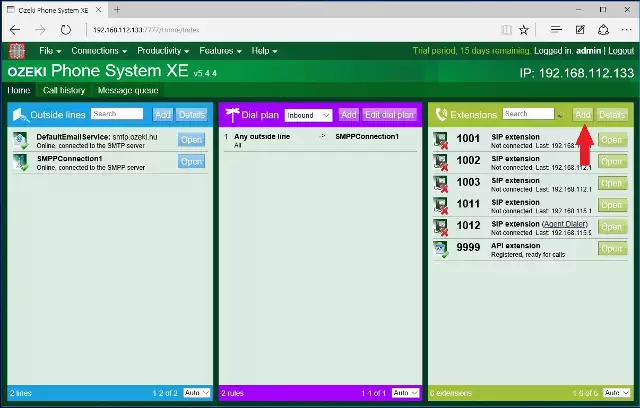
Step 5 - Sending SMS message
To be able to create your sms service, you have to install an SMS Extension in the PBX. You can add this solution by clicking on the add button in the extensions.
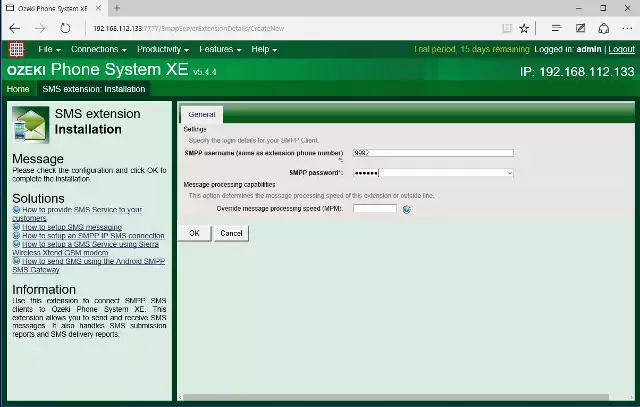
Then you have to add connection data while installing the extension. Your client users will be able to join your service with the provided data.
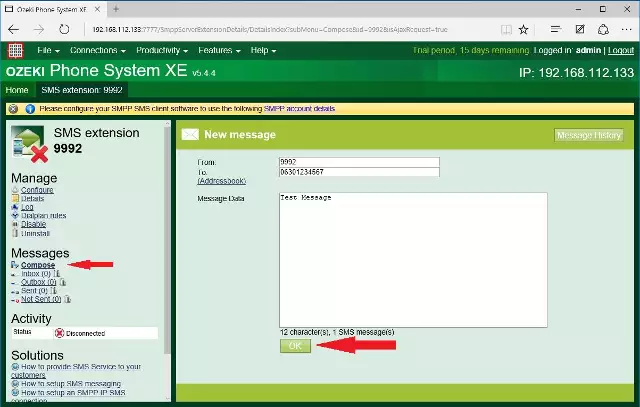
Clicking on the compose button, you can see the SMS sending interface, where you can add the phone number of the recipient and the text of the message.
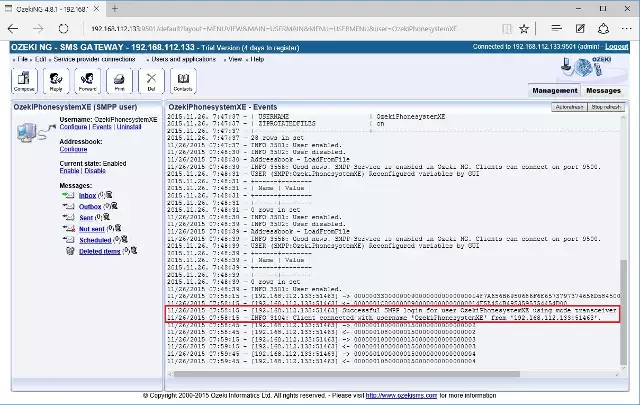
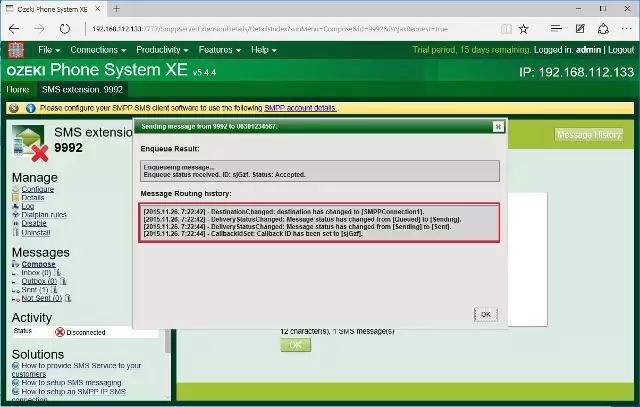
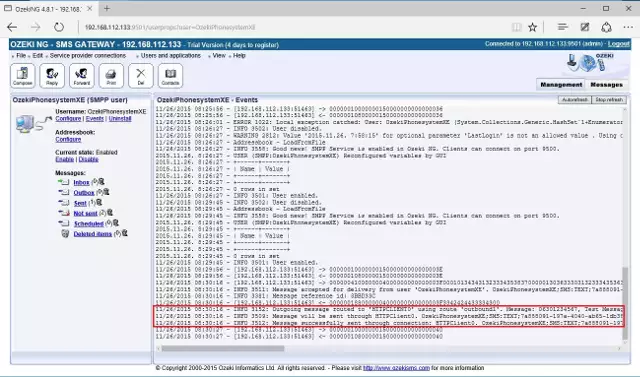
In the case of proper setup, you can see in the logs of both the PBX and the SMS Gateway that the PBX forwards the SMS message to the gateway, which receives that and sends out the message to the chosen SMS provider.
On the following website you can see a tutorial which shows you step-by-step how to connect the Ozeki Phone System and the Ozeki NG SMS Gateway: Youtube video
